Recipes
We made some common recipes for some third-party integrations available to help you get started.
ESLint
If you're using ESLint, you can use the ESLint recipe to run your linting checks.
Install the ESLint recipe
npm install @pierre/eslint
Add the ESLint recipe
Add the following file to your .pierre/ci folder.
import { Job } from '@pierre/eslint';

export default Job();
Prettier
If you're using Prettier, you can use the Prettier recipe to format your code. The prettier job will only report on formatting failures, it will not rewrite your files.
Install the Prettier recipe
npm install @pierre/prettier
Add the Prettier recipe
import { Job } from '@pierre/prettier';

export default Job();
Typescript
If you're using Typescript, you can use the Typescript recipe to run your typechecking checks. Type errors will automatically be annotated on your code.
Install the Typescript recipe
npm install @pierre/typescript
Add the Typescript recipe
import { Job } from '@pierre/typescript';

export default Job();
Vercel
If you're using Vercel, you can use the Vercel recipe to set up production deployments when merging main and attach preview deployments to all other changes.
Note: Unlike the other recipes, Vercel is a bit more involved. Follow the steps below to get started.
Install the Vercel CLI
If you haven't already, make sure you have a current Vercel account. Next, we'll use the Vercel CLI to quickly setup a deployable project for your repo.
npm install -g vercel
Run vercel link
Run the link command from the root of your repo. The link command will take you through creating a
new project or linking an existing project to your local repo.
vercel link
Grab the project and org IDs
Once you've linked your project, you can grab your project and org IDs from the
.vercel/project.json.
Note: the contents of project.json should look something like
{"projectId":"prj_****","orgId":"team_***"}
Create a vercel access token
The vercel recipe requires a Vercel access token to deploy code on your behalf. You can create a new access token by visiting https://vercel.com/account/tokens.
Give your toke a name and be sure to set the expiration date (No expiration is recommended).
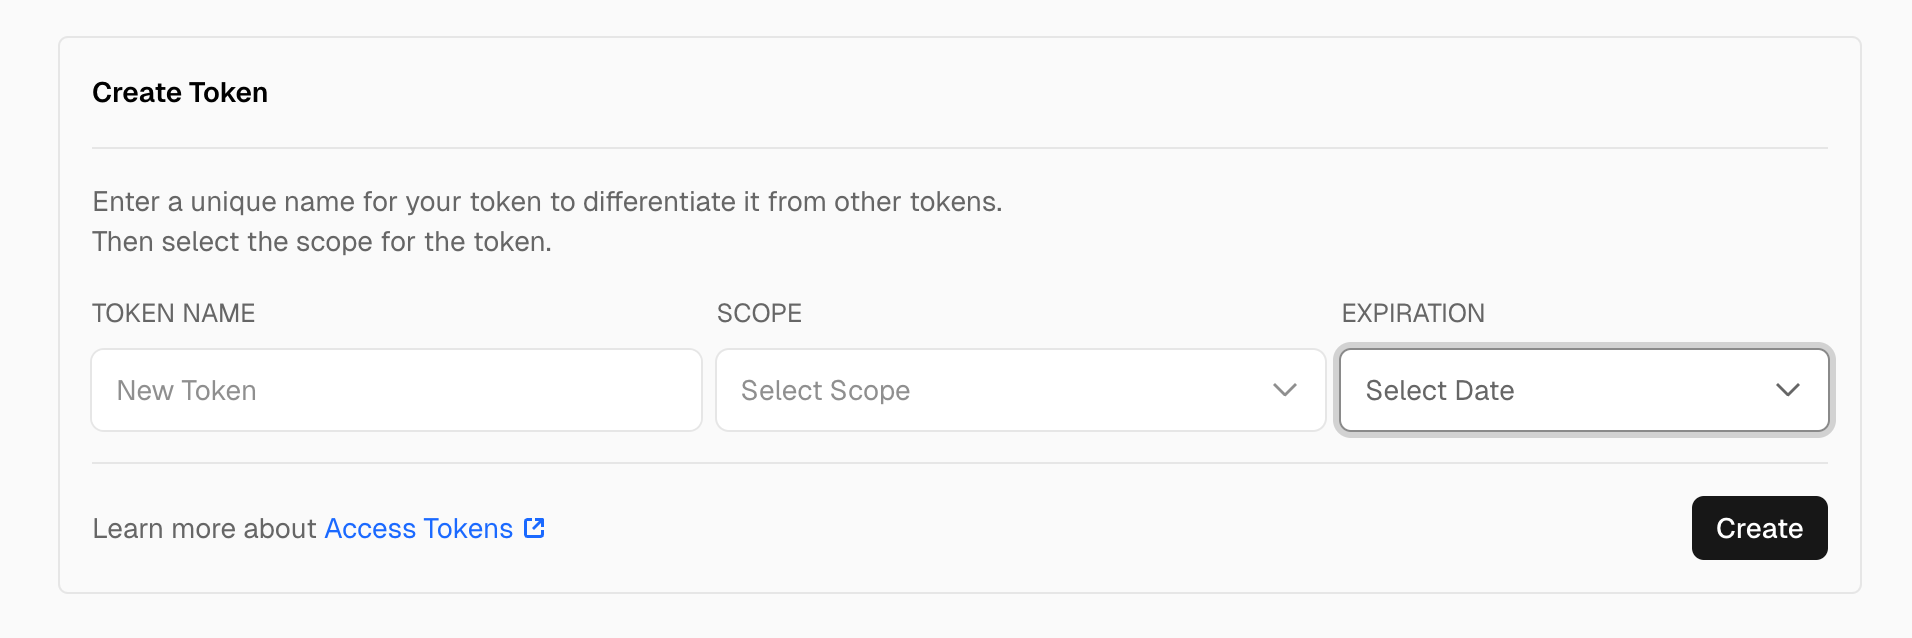
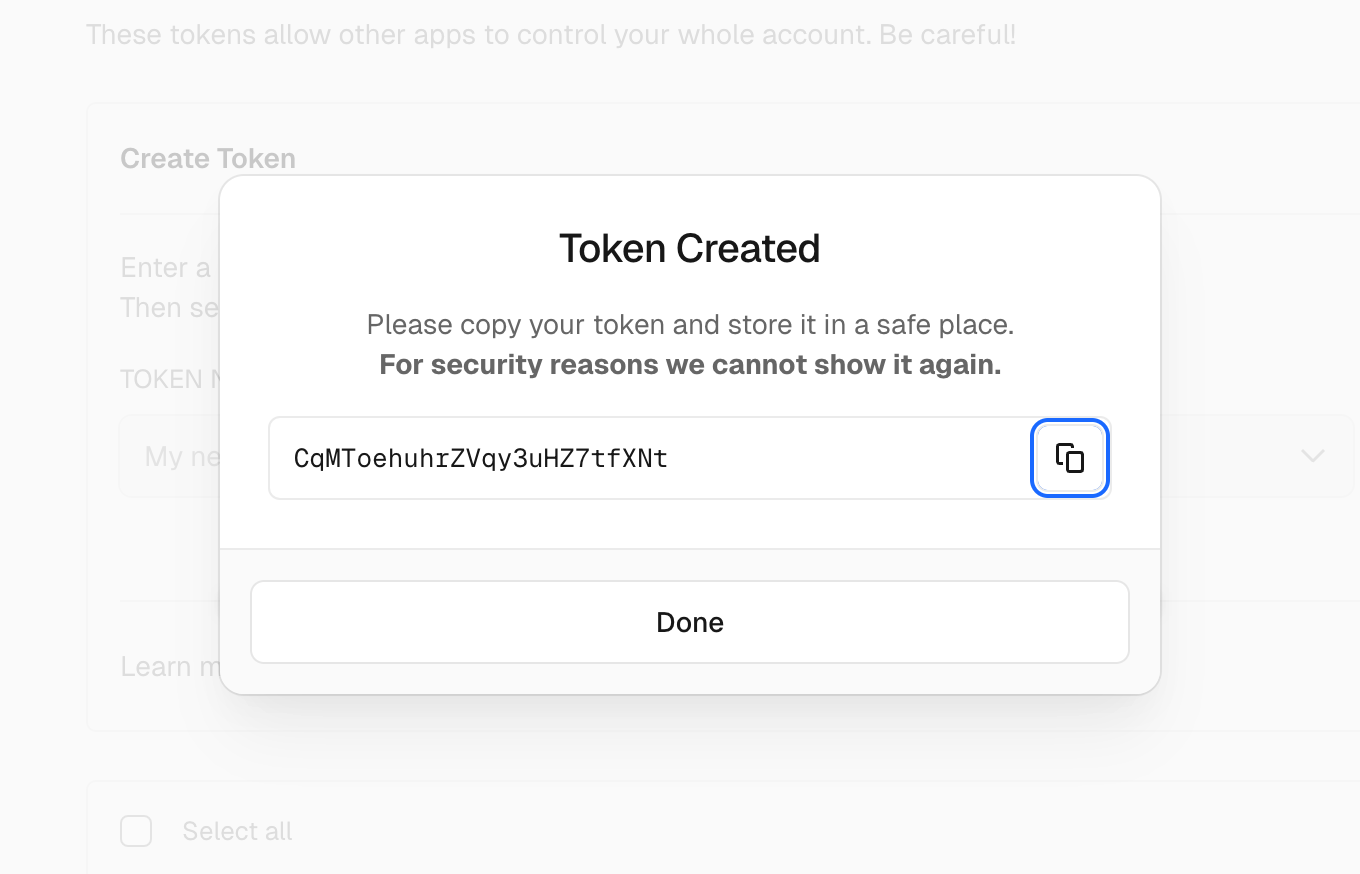
Be sure to copy the token after you create it.
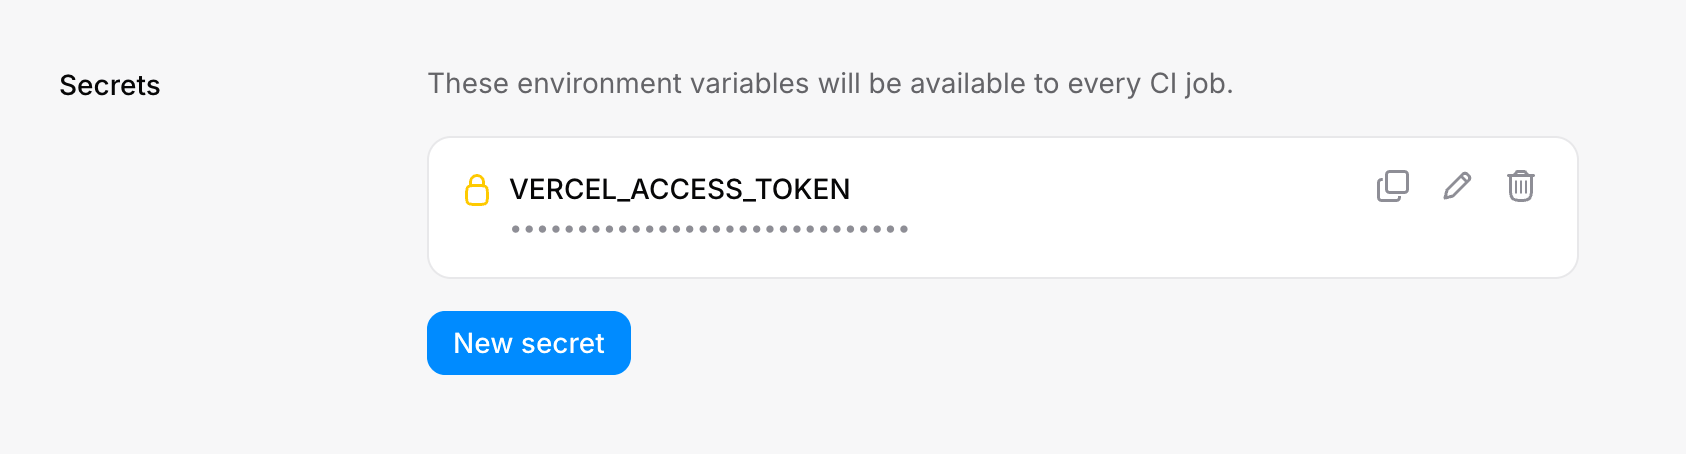
Head over to your repo’s settings page and add the token as a CI secret. It is important that you
name the secret VERCEL_ACCESS_TOKEN.
Add the vercel recipe
Add @pierre/vercel to your package.json file and add the following file to your .pierre/ci
folder.
Note: the
VERCEL_ORG_IDandVERCEL_PROJECT_IDare the values you grabbed in step 3.
import { Job } from '@pierre/vercel';

export default Job({
  VERCEL_ORG_ID: 'team_***',
  VERCEL_PROJECT_ID: 'prj_***',
});
If you need any additional help, please reach out to us on Discord!
Joyful code review
Pierre wants you to enjoy code review with your team. So, we built a ~NEW~*~ Git platform to do just that.
We're in public beta! Join our Discord to share feedback and chat with the Pierre team.